In this post we will learn how to record a test plan in JMeter.
Follow the steps below. I have kept it in simple and interactive way, so follow each step following the screen to cross-check with yours.


Loop count – 5


This is the way we record a test plan in JMeter. I hope you will not get any problems in recording if you follow all steps in flow.
1] Go to jakarta-jmeter-2.5.1 > bin > ApacheJMeter (Executable Jar File)
OR
Go to jakarta-jmeter-2.5.1 > bin > jmeter.bat (Windows Batch File)
You will get started to JMeter Screen.
2] Add Thread Group
Right Click on Test Plan > Add > Threads (Users) > Thread Group

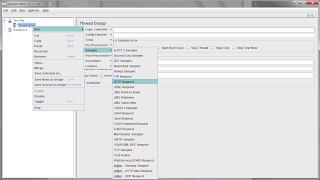
3] Add HTTP Request to the Thread Group
Right Click on Thread Group > Add > Sampler > HTTP Request
A HTTP Request element will be added below Thread Group in element tree and now Add the Server Name or IP as “ http://www.irctc.co.in “


4] Add Recording Controller to the Thread Group
Right Click on Thread Group > Add > Logic Controller > Recording Controller

5] Add Proxy Server to the Workbench
Right Click on Workbench > Add > Non-test Elements > HTTP Proxy Server

6] On HTTP Proxy Server, click 3 times the “Add” button in “URL Patterns to Exclude”. This will create 3 blank entries.
Enter “.*\.png” pattern, “.*\.gif” pattern and “.*\.ico” pattern

Add Listener View Results Tree
Click on Thread Group > Add > Listener > View Results Tree

7] Now Start the HTTP Proxy Server

8] Now go to Mozilla Firefox and type http://www.irctc.co.in
9] Now Login in as a user and do some actions on the Mozilla Firefox and just logout and Stop the recording from proxy server in JMeter and then the recordings would be generated as a script in the JMeter Window.

10] Applying Load :
Select Thread Group
Number of threads – enter 5
Ramp up period – do not change

11] At this point, we are ready to run our test plan and see what happens. But first Save the test plan. When you're ready to run the test, there's two ways:
Run menu > Start OR
Ctrl + R
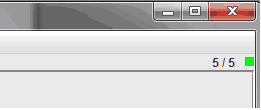
While the test is running, in the upper right-hand corner, there should be a green square.
When the test is done, the box should be grey.
12] Now check the results of the script which we just run in the “View Results Tree” element below Thread Group element.

This is the way we record a test plan in JMeter. I hope you will not get any problems in recording if you follow all steps in flow.