We are already done with the introduction and installation of TestNG, today we are writing our first test case in TestNG.
Scenario:-How to execute our First Test Case using TestNG
Solution:-
Step 1:-Adding TestNG class
A:-Press CTRL+N ->TestNG->Create TestNG Class
B:-Set Class Name and select Annotations ->Finish
Step 2:-Adding the code to the new Class
A. @BeforeMethod:-Launch Browser and its settings.
B. @Test:- Our Login Test Case
C. @AfterMethod:-Quit Browser
Code:-
Step 3:-Running the Code
RightClick on the TestCase ->Run As -> TestNG Test
or
CTRL+F11
Step 4:-Observing the Run Results
Eclipse will have results in Console window, while TestNG result will be shown separately in "Results of Running class TestName".
Step 5:-Checking the HTML Reports
Method1:-We can go to the Project Directory ->test-output folder
How to locate the Project Directory?
Right click in the solution explorer ->Properties
Method2:-In the solution explorer ->test-output->index.html (it will show the latest run results)
Scenario:-How to execute our First Test Case using TestNG
Solution:-
Step 1:-Adding TestNG class
A:-Press CTRL+N ->TestNG->Create TestNG Class
 |
| Creating TestNG Class |
B:-Set Class Name and select Annotations ->Finish
 |
| Class name + Annotations |
A. @BeforeMethod:-Launch Browser and its settings.
B. @Test:- Our Login Test Case
C. @AfterMethod:-Quit Browser
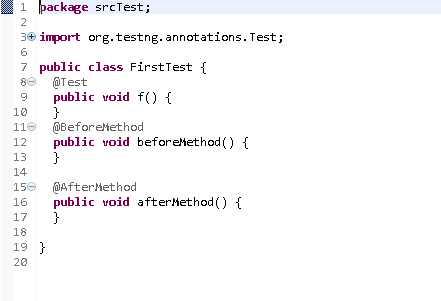 |
| Default view of TestNG Class with Annotations |
package srcTest;
import java.util.concurrent.TimeUnit;
import org.openqa.selenium.By;
import org.openqa.selenium.WebDriver;
import org.openqa.selenium.firefox.FirefoxDriver;
import org.testng.annotations.Test;
import org.testng.annotations.BeforeMethod;
import org.testng.annotations.AfterMethod;

public class FirstTest {
private WebDriver driver;
   @Test
   public void login() {
  //Fill the UserName and Password fields
  driver.findElement(By.id("userName")).sendKeys("uftHelp");
  driver.findElement(By.id("password")).sendKeys("Password");
  //Click the Sign in Button
  driver.findElement(By.id("SignIn")).click();
  //Clicking on the alert message
  driver.switchTo().alert().accept();
   }
   @BeforeMethod
   public void beforeMethod() {
   driver = new FirefoxDriver();
  //Adding Implicit wait
  driver.manage().timeouts().implicitlyWait(20, TimeUnit.SECONDS);
  //Maximize browser
  driver.manage().window().maximize();
  //Open the Login Application
  driver.get("http://www.ufthelp.com/p/testpage.html");
   }

   @AfterMethod
   public void afterMethod() {
  //Closing the browser
  driver.quit();
   }

}
Step 3:-Running the Code
RightClick on the TestCase ->Run As -> TestNG Test
or
CTRL+F11
Step 4:-Observing the Run Results
Eclipse will have results in Console window, while TestNG result will be shown separately in "Results of Running class TestName".
 |
| Run Results of TestNG |
Step 5:-Checking the HTML Reports
Method1:-We can go to the Project Directory ->test-output folder
How to locate the Project Directory?
Right click in the solution explorer ->Properties
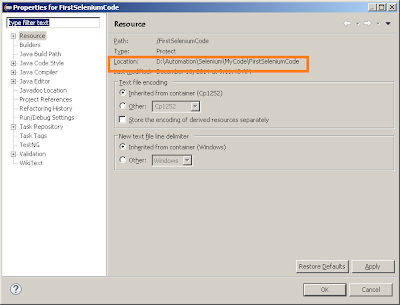 |
| Path of project directory |
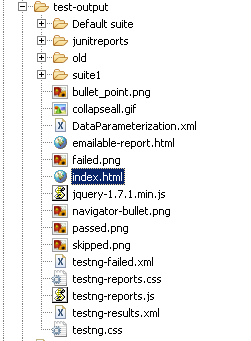 |
| index.html file in test-output folder in solution explorer |
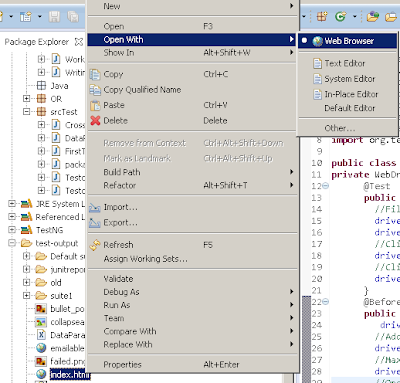 |
| Opening the index.html file |
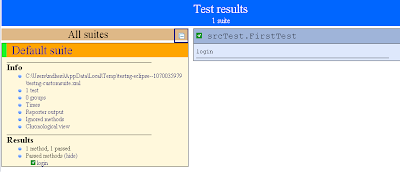 | ||
| Test Results - TestNG
We can open the emailable-report.html from test-output folders.
|

