A Simple Java Program

Below is the Java Program which Prints Selenium--By-Arun text as output:


        class Simple
        {
                   public static void main(String args[])
                   {
                         System.out.println("Selenium-By-Arun");
                   }
        }

Lets understand the above Java Program by identifying the terminology used in it.

On high level, the above program has main method inside the class Simple 
  1. class is used to declare a class in java. (Will explain the concept of class in depth in upcoming posts)
  2. public means visible to all. (Will explain the concept of public in depth in upcoming posts)
  3. static If any method is declared as static, then the method is called as static method. If the method is declared as static, then there is no need of creating object to invoke the main method (Will explain the concept of static and objects in depth in upcoming posts)
  4. main represents the start of the program. The program execution starts from main method. (Will explain the concept of methods in depth in upcoming posts)
  5. String args[] is used for command line argument (Will explain this in the later posts)
  6. System.out.println() is used to print statements.

Configure Java

Pre-requisite You have to install Java JDK as explained in my previous Install Java JDK


Configuring the Java JDK:

Follow the below steps to configure the Java JDK:

We have to configure the Java by configuring the build path.

If you want to save the created java files outside the bin folder then you have to set path of JDK. Path is required for using Javac and Java tools. Javac tool compiles the Java code and Java tool will run the code.

How to set path of JDK will be explained below:

1. Click on 'My Computer' icon on your desktop as shown below - 


2. When your drives are displayed in your My Computer window, right click any where inside the window and select 'Properties' option as shown below -


3. Click on 'Advanced System Settings' option as shown below:


4. Click on 'Environment Variables Button as shown below:


5. Click on 'New' button under the User variables as shown below:


6. Type 'path' into the 'Variable Name' as shown below:


7.  In 32 bit machines -> Go to C:\Program Files (x86)\Java\jdk[Version]\bin folder and copy the path of the bin folder as shown below (But in 64 bit machines -> You need to go to C:\Program Files\Java\jdk[Version]\bin folder )


8. Paste path of the bin folder in Variable Value field as shown below and click on 'OK' button


9. Ensure that the path is added under the User variables and Click on 'OK' button as shown below to finish the process


Check whether the Installed and configured Java works:

1. Open Windows Command line as shown below:


2. Type the command java -version in the Command line window as shown below and press 'Enter' key on your keyboard as shown below:


3. Ensure that the Java version we've installed and configured is displayed on executing the command specified in step 2 as shown below:


If you see the version of Java that is installed as shown in the above screenshot, it means that your Java is working.

Now you are ready to run any java program. But before running the Java program lets go through a sample Java program and understand the basic concepts. 

Notes - 

1. You can also install JRE (Java Run Time Environment) instead of JDK (Java Development Kit). You can use Eclipse IDE and develop automation scripts when you install JRE instead of JDK prior to installing Eclipse IDE as Eclipse IDE contains its own features for developing and compiling Java.

2. If you want to Run Java Programs using any other editors instead of Eclipse IDE, then installation of Java JDK is must as the editors wont have  features to develop and compile Java programs. So installing JRE prior to running Java programs on any other editors instead of Eclipse IDE wont work. JDK is must in this case.

3. When you are running your automation scripts developed using Java programming language on Eclipse IDE, you can simply install JRE instead of JDK if you want to save your computers memory. JRE installation take less time and less memory to store.

Install Java JDK

Eclipse IDE is required to run Java programs. But we cant run Eclipse IDE without having Java Development kit (JDK) installed in our machines. So we have to install Java JDK first as explained in the below steps:


1. Open http://www.oracle.com/technetwork/java/javase/downloads/index.html in any browser
2. Select 'Java Platform (JDK) category' to download Java JDK as shown below -


3. Select the 'License Agreement' as shown below:


4. Download the 32 bit version of Java JDK (i.e. Windows x86 in the below screen) if you have 32 bit machine else if you have 64 bit machine install 64 bit version of Java JDK  (i.e. Windows x64 in the below screen) -


5. Install the downloaded JDK file and ensure that JDK and JRE folders got created at the C:\Program Files (x86)\Java folder path for 32 bit machine (But for 64 bit machine they will get created at the C:\Program Files\Java folder)


What is Java ?

Java is a platform-independent and object oriented programming language.

  • Object Oriented Programming Language: As Structured programming languages like C failed to manage the complex application's code due to lack of organizing the code capability, as a result object oriented programming (OOP) was invented. OOP is a programming methodology that helps organize complex programs through the use of inheritance, encapsulation and polymorphism methodologies. 
  • Platform-Independent Programming Language:  The output of a Java compiler is not executable code rather its a bytecode. Bytecode is a highly optimized set of instructions designed to be executed by Java run-time system, which is called the Java Virtual Machine (JVM). Translating a Java program into bytecode makes it much easier to run a program in a wide variety of environments because only the JVM needs to be implemented/designed for each platform. So the use of byte code as an intermediate language permits Java to run on any platform.

Java for Selenium

We came to a point where learning Java is must else we wont be able to understand the upcoming posts on Selenium 1, Selenium 2 and Selenium Grid etc which requires Java knowledge. So I've decided to write posts on Java.


And also I've explained the Java concepts required by Selenium in a practical way using Eclipse IDE.

So, Please go through the Java posts for two reasons
  1. For learning Java required by Selenium Automation
  2. For learning how to use Eclipse IDE (As we will be using Eclipse IDE for Selenium Automation also)
As it is very difficult to learn Java from a single post. I've written few posts on Java and used Eclipse IDE tool to execute the Java concepts.

Please read the next post to start learning Java and Eclipse IDE for Selenium

Integration Testing: Must Know Stuff!

Definition and Terminologies:

In Integration Testing, individual software modules are integrated logically and tested as a group.
A typical software project consists of multiple software modules, coded by different programmers.  Integration testing focuses on checking data communication amongst these modules.
Hence it is also termed as 'I & T' (Integration and Testing), 'String Testing' and sometimes 'Thread Testing'.

Need of Integration Testing:

Although each software module is unit tested, defects still exist for various reasons like
  • A Module in general is designed by an individual software developer whose understanding and programming logic may differ from other programmers. Integration testing becomes necessary to verify the software modules work in unity
  • At the time of module development, there are wide chances of change in requirements by the clients. These new requirements may not be unit tested and hence integration testing becomes necessary.
  • Interfaces of the software modules with the database could be erroneous
  • External Hardware interfaces, if any, could be erroneous
  • Inadequate exception handling could cause issues.
Integration Test Case:
Integration Test case differs from other test cases in the sense it focuses mainly on the interfaces & flow of data/information between the modules. Here priority is to be given for the integrating links rather than the unit functions which are already tested.
Sample Integration Test Cases for the following scenario:Application has 3 modules say 'Login Page', 'Mail box' and 'Delete mails' and each of them are integrated logically.
Here do not concentrate much on the Login Page testing as it's already been done in Unit Testing. But check how it's linked to the Mail Box Page.
Similarly Mail Box: Check its integration to the Delete Mails Module.
hodologies/Strategies of Integration Testing:
The Software Industry uses variety of strategies to execute Integration testing , viz.
  •  Big Bang Approach :
  •  Incremental Approach: which is further divided into following
    •  Top Down Approach
    •  Bottom Up Approach
    •  Sandwich Approach - Combination of Top Down and Bottom Up
Below are the different strategies, the way they are executed and their limitations as well advantages.

Big Bang Approach:

Here all component are integrated together at once, and then tested.

Advantages:

  • Convenient for small systems.

Disadvantages:

  • Fault Localization is difficult.
  • Given the sheer number of interfaces that need to be tested in this approach, some interfaces links to be tested could be missed easily.
  • Since the integration testing can commence only after "all" the modules are designed, testing team will have less time for execution in the testing phase.
  • Since all modules are tested at once, high risk critical modules are not isolated and tested on priority. Peripheral modules which deal with user interfaces are also not isolated and tested on priority.

Incremental Approach:

In this approach, testing is done by joining two or more modules that are logically related. Then the other related modules are added and tested for the proper functioning. Process continues until all of the modules are joined and tested successfully.
This process is carried out by using dummy programs called Stubs and Drivers. Stubs and Drivers do not implement the entire programming logic of the software module but just simulate data communication with the calling module.
Stub: Is called by the Module under Test.
Driver: Calls the Module to be tested.
Incremental Approach in turn is carried out by two different Methods:
  • Bottom Up
  • Top Down

Bottom up Integration

In the bottom up strategy, each module at lower levels is tested with higher modules until all modules are tested. It takes help of Drivers for testing
Diagrammatic Representation:

Advantages:

  • Fault localization is easier.
  • No time  is wasted waiting for all modules to be developed unlike Big-bang approach

Disadvantages:

  • Critical modules (at the top level of software architecture) which control the flow of application are tested last and may be prone to defects.
  • Early prototype is not possible

Top down Integration:

In Top to down approach, testing takes place from top to down following the control flow of the software system.
Takes help of stubs for testing.
Diagrammatic Representation:

Advantages:

  • Fault Localization is easier.
  • Possibility to obtain an early prototype.
  • Critical Modules are tested on priority; major design flaws could be found and fixed first.

Disadvantages:

  • Needs many Stubs.
  • Modules at lower level are tested inadequately.


Integration Testing Procedure

The integration test procedure irrespective of the test strategies (discussed above):
  1. Prepare the Integration Test Plan
  2. Design the Test Scenarios, Cases, and Scripts.
  3. Executing the test Cases followed by reporting the defects.
  4. Tracking & re-testing the defects.
  5. Steps 3 and 4 are repeated until the completion of Integration is successfully.

Brief Description of Integration Test Plans:

It includes following attributes:
  • Methods/Approaches to test (as discussed above).
  • Scopes and Out of Scopes Items of Integration Testing.
  • Roles and Responsibilities.
  • Pre-requisites for Integration testing.
  • Testing environment.
  • Risk and Mitigation Plans.

Entry and Exit Criteria.

Entry and Exit Criteria to Integration testing phase in any software development model
Entry Criteria:
  • Unit Tested Components/Modules
  • All High prioritized bugs fixed and closed
  • All Modules to be code completed and integrated successfully.
  • Integration test Plan, test case, scenarios to be signed off and documented.
  • Required Test Environment to be set up for Integration testing
Exit Criteria:
  • Successful Testing of Integrated Application.
  • Executed Test Cases are documented
  • All High prioritized bugs fixed and closed
  • Technical documents to be submitted followed by release Notes.

Best Practices/ Guidelines for Integration Testing

  • First determine the Integration Test Strategy that could be adopted and later prepare the test cases and test data accordingly.
  • Study the Architecture design of the Application and identify the Critical Modules. These need to be tested on priority.
  • Obtain the interface designs from the Architectural team and create test cases to verify all of the interfaces in detail. Interface to database/external hardware/software application must be tested in detail.
  • After the test cases, it's the test data which plays the critical role.
  • Always have the mock data prepared, prior to executing. Do not select test data while executing the test cases.

Unit Testing: Complete Guide

Unit testing of software applications is done during the development (coding) of an application.
The objective of unit testing is to isolate a section of code and verify its correctness. In procedural programming a unit may be an individual function or procedure
The goal of unit testing is to isolate each part of the program and show that the individual parts are correct. Unit testing is usually performed by the developer.

Why do Unit Testing? Why it is important?

Sometimes software developers attempt to save time by doing minimal unit testing. This is a myth because skimping on unit testing leads to higher defect fixing costs during system testing, integration testing and even beta testing after the application is completed. Proper unit testing done during the development stage saves both time and money in the end.

Unit testing in Software Testing Life Cycle

Building unit Test Cases
Unit testing is commonly automated, but may still be performed manually. The IEEE does not favor one over the other. A manual approach to unit testing may employ a step-by-step instructional document.
Under the automated approach-
  • A developer could write another section of code in the application just to test the function. They would later comment out and finally remove the test code when the application is done.
  • They could also isolate the function to test it more rigorously. This is a more thorough unit testing practice that involves copy and pasting the function to its own testing environment to other than its natural environment. Isolating the code helps in revealing unnecessary dependencies between the code being tested and other units or data spaces in the product. These dependencies can then be eliminated.

A coder may use a Unit Test Framework to develop automated test cases. Using an automation framework, the developer codes criteria into the test to verify the correctness of the unit. During execution of the test cases, the framework logs those that fail any criterion. Many frameworks will also automatically flag and report in a summary these failed test cases. Depending upon the severity of a failure, the framework may halt subsequent testing.

 Mock Objects

Unit testing relies on mock objects being created to test sections of code that are not yet part of a complete application. Mock objects fill in for the missing parts of the program. For example, you might have a function that needs variables or objects that are not created yet. In unit testing, those will be accounted for in the form of mock objects created solely for the purpose of the unit testing done on that section of code.

Unit Testing Tools

There are several automated tools available to assist with unit testing. We will provide a few examples below:
  • Rational Software - Rational Software by IBM has a unit test feature known as "Rational Test Realtime". The software contains a complete range of testing tools for much more than just unit testing. It is used for Ada, Java, C and C++. It creates unit tests by reverse engineering the software.  Operating systems it supports include Windows, Linux, Solaris, HP-UX and AIX. Go to http://www-01.ibm.com/software/rational/ to learn more.
  • JavaScript Assertion Unit- Also known as jsAsserUnit, this Freeware JavaScript unit testing tool can be used on any platform that supports JavaScript. It is available athttp://jsassertunit.sourceforge.net/docs/index.html
  • CUT - CUT is a Freeware unit test tool for C, C++ and Objective C. It is great for embedded software testing frameworks and desktop applications on Linux and Windows operating systems. Learn more at sourceforge.net by going to http://sourceforge.net/projects/cut/.
  • Dotunit - Dotunit is a .net framework Freeware unit testing tool. Part of Junit on the Microsoft .net framework, Dotunit is used for automating unit testing on windows systems. This is another tool from sourceforge.net, so look for it at: http://dotunit.sourceforge.net/
 Those are just a few of the available unit testing tools. There are lots more, especially for C languages and Java, but you are sure to find a unit testing tool for your programming needs regardless of the language you use.

Extreme Programming & Unit Testing

Unit testing in Extreme Programming involves the extensive use of testing frameworks. A unit test framework is used in order to create automated unit tests. Unit testing frameworks are not unique to extreme programming, but they are essential to it. Below we look at some of what extreme programming brings to the world of unit testing:

  • Tests are written before the code
  • Rely heavily on testing frameworks
  • All classes in the applications are tested
  • Quick and easy integration is made possible

 Unit Testing Myth

It requires time and I am always overscheduled
My code is rock solid! I do not need unit tests.

Myths by their very nature are false assumptions.  These assumptions lead to a vicious cycle as follows -

 
Truth is
Unit testing increase the speed of development.
Programmers think that integration testing will catch all errors and do not unit test. Once units are integrated, very simple errors which could have very easily found and fixed in unit tested take very long time to be traced and fixed.

Unit Testing benefits

  • Developers looking to learn what functionality is provided by a unit and how to use it can look at the unit tests to gain a basic understanding of the unit API.
  • Unit testing allows the programmer to refactor code at a later date, and make sure the module still works correctly (i.e. Regression testing). The procedure is to write test cases for all functions and methods so that whenever a change causes a fault, it can be quickly identified and fixed.
  • Due to the modular nature of the unit testing, we can tests parts of project without waiting for others to be completed.

Unit Testing Limitations

  • Unit testing can't be expected to catch every error in a program. It is not possible to evaluate all execution paths even in the most trivial programs
  • Unit testing by its very nature focuses on a unit of code. Hence it can't catch integration errors or broad system level errors.
 It's recommended unit testing be used in conjunction with other testing activities.
 Unit testing best practices
  • Unit Test cases should be independent. In case of any enhancements or change in requirements, unit test cases should not be affected.
  • Test only one code at a time.
  • Follow clear and consistent naming conventions for your unit tests
  • In case of change in code in any module, ensure there is a corresponding unit test case for the module and the module passes the tests before changing the implementation
  • Bugs identified during unit testing must be fixed before proceeding to the next phase in SDLC
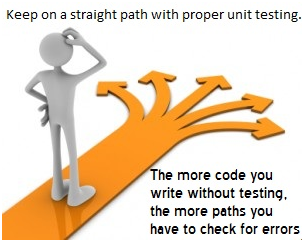
  • Adopt a "test as your code" approach. The more code you write without testing the more paths you have to check for errors.
 Summary
As you can see, there can be a lot involved in unit testing. It can be complex or rather simple depending on the application being tested and the testing strategies, tools and philosophies used. Unit testing is always necessary on some level. That is a certainty.

Automated Testing: Process, Planning, Tool Selection

Manual testing is performed by a human sitting in front of a computer carefully executing the test steps. Automation Testing means using an automation tool to execute your test case suite.   The automation software can also enter test data into the System Under Test ,  compare  expected and actual  results and generate detailed test  reports.
Test Automation demands considerable investments of money and resources. Successive development cycles will require execution of same test suite repeatedly. Using a test automation tool it's possible to record this test suite  and re-play it  as required. Once the  test suite is automated,  no human intervention is required . This improved ROI of Test Automation.
Goal of Automation is to reduce number of test cases to be run manually and not eliminate manual testing all together.
Why Automated Testing?
why automation testing

  Automated testing is important due to following reasons: 
  • Manual Testing of all work flows, all fields , all negative scenarios is time and cost consuming
  • It is difficult to test for multi lingual sites manually
  • Automation does not require Human intervention. You can run automated test unattended (overnight)
  • Automation increases  speed of test execution
  • Automation helps increase  Test Coverage
  • Manual Testing can become boring and hence error prone.


Which Test Cases to Automate?

Test cases to be automated can be selected using the following criterion to increase the automation ROI
  • High Risk - Business Critical test cases
  • Test cases that are executed repeatedly
  • Test Cases that are very tedious or difficult to perform manually
  • Test Cases which are time consuming

The following category of test cases are not suitable for automation:
  • Test Cases that are newly designed and not executed manually  atleast once
  • Test Cases for which the requirements are changing frequently
  • Test cases which are executed on ad-hoc basis.

Automation Process

Following steps are followed in an Automation Process


Test tool selection

Test Tool selection largely depends on the technology the Application Under Test is built on. For instance QTP does not support Informatica.  So QTP cannot be used for testing Informatica applications. It's a good idea to conduct Proof of Concept of Tool on AUT
Define the scope of Automation
Scope of automation is the area of your Application Under Test which will be automated. Following points help determine scope:
  • Feature that are important for the business
  • Scenarios which have large amount of data
  • Common functionalities across applications
  • Technical feasibility
  • Extent to which business components are reused
  • Complexity of test cases
  • Ability to use the same test cases for cross browser testing
 Planning, Design and Development 
During this phase you create  Automation strategy & plan, which contains following details-
  • Automation tools selected
  • Framework design and its features
  • In-Scope and Out-of-scope items of automation
  • Automation test bed preparation
  • Schedule and Timeline of scripting and execution
  • Deliverables of automation testing
 Test Execution
Automation Scripts are executed during this phase. The scripts need input test data before there are set to run. Once executed they provide detailed test reports.  
Execution can be performed using the automation tool directly or through the Test Management tool which will invoke the automation tool.
Example: Quality center is the Test Management tool which in turn it will invoke QTP for execution of automation scripts. Scripts can be executed in a single machine or a group of  machines. The execution can be done during night , to save time.
Maintenance
 As new functionalities are added to the System Under Test with successive cycles, Automation Scripts need to be added, reviewed and maintained for each release cycle. Maintenance becomes necessary to improve effectiveness of Automation Scripts. 
Automation tools
Following are the most popular test tools :
testing tools
 QTP : HP's  Quick Test Professional ( now known as HP Functional Test) is the market leader in Functional Testing Tool. The tool supports plethora of environments including SAP , Java , Delphi amongst others. QTP can be used  in conjunction with Quality Center which is a comprehensive Test  Management Tool.  know  is light tool which can be recommended for web or client/server applications.
Rational Robot: It  is an IBM tool used to automate regression, functional and configuration tests for client server, e-commerce as well as  ERP applications. It can be used with Rational Test Manager which aided in Test Management Activities 
Selenium: Its an open source Web Automation Tool. It supports all types of web browsers. Despite being open source its actively developed and supported
  

How to Choose an Automation Tool? 

Selecting the right tool can be a tricky task. Following criterion will help you select the best tool for your requirement-
  • Environment Support
  • Ease of use
  • Testing of Database
  • Object identification
  • Image Testing
  • Error Recovery Testing
  • Object Mapping
  • Scripting Language Used
  • Support for various types of test - including functional, test management, mobile, etc...
  • Support for multiple testing frameworks
  • Easy to debug the automation software scripts
  • Ability to recognize objects in any environment
  • Extensive test reports and results
  • Minimize training cost of selected tools 
Tool selection is one of biggest challenges to be tackled before going for automation. First, Identify the requirements, explore various tools and its capabilities, set the expectation from the tool and go for a Proof Of Concept.
Framework in Automation 
A framework is  set of automation guidelines  which help in  
  • Maintaining consistency of Testing
  • Improves test structuring
  • Minimum usage of code
  • Less Maintenance of code
  • Improve re-usability
  • Non Technical testers can be involved in code
  • Training period of using the tool can be reduced
  • Involves Data wherever appropriate 
There are four types of framework used in software automation testing:

  1. Data Driven Automation Framework
  2. Keyword Driven Automation Framework
  3. Modular Automation Framework
  4. Hybrid Automation Framework 

Automation Best Practices: 

To get maximum ROI of automation, observe the following
  • Scope of Automation needs to be determined in detail before the start of the project. This sets expectations from Automation right.
  • Select the right automation tool: A tool must not be selected based on its popularity but it's fit to the automation requirements.
  • Choose appropriate framework
  • Scripting Standards- Standards have to be followed while writing the scripts for Automation .Some of them are-
    • Create uniform scripts, comments and indentation of the code
    • Adequate Exception handling - How error is handled on system  failure or unexpected behavior of the application.
    • User defined messages should be coded or standardized for Error Logging for testers to understand.
  • Measure metrics- Success of automation cannot be determined by   comparing the manual effort with the automation effort but by also capturing the following metrics.
    • Percent of defects found
    • Time required for automation testing for each and every release cycle
    • Minimal Time taken for release   
    • Customer satisfaction Index
    • Productivity improvement
The above guidelines if observed can greatly help in making your automation successful.

Benefits of automated testing

 Following are benefits of automated testing:
automation benefits

  • 70% faster than the manual testing
  • Wider test coverage of application features
  • Reliable in results
  • Ensure Consistency
  • Saves Time and Cost
  • Improves accuracy
  • Human Intervention is not required while execution
  • Increases Efficiency
  • Better speed in executing tests
  • Re-usable test scripts
  • Test Frequently and thoroughly
  • More  cycle of execution can be achieved through automation 
  • Early time to market
 Conclusion
Right selection of automation tool, testing process and team, are important players for automation to be successful. Manual and automation methods go hand-in hand for successful testing.

Manual Testing Tutorials for Beginners

In Manual Testing , Testers manually execute test cases without using any automation tools. Manual testing is the most primitive of all testing types and helps find bugs in the software system.
 Any new application must be manually tested before its testing can be automated. Manual testing requires more effort, but is necessary to check  automation feasibility.
Manual Testing does not require knowledge of any testing tool. One of the  Software Testing Fundamental is "100% Automation is not possible". This makes Manual Testing imperative. 
Goal of Manual Testing
The goal of Manual Testing is to ensure that the application is error free and it is working in conformance to the specified functional requirements. Test Suites or cases ,are designed during the testing phase and should have 100% test coverage.
It also makes sure that reported defects are fixed by developers and re-testing has been performed by testers on the fixed defects. Basically, this testing checks the quality of the system and delivers bug-free product to the customer.

Manual Testing types:

Below given diagram depicts Manual Testing Types. In fact any type of software testing type can be executed both manually as well using an automation tool.

Myths of Manual Testing


Following are few common myths and facts related to testing:
Myth: Anyone can do manual testing
Fact: Testing requires many skill sets
Myth: Testing ensures 100% defect free product
Fact: Testing attempts to find as many defects as possible. Identifying all possible defects is impossible.
Myth: Automated testing is more powerful than manual testing
Fact: 100% test automation cannot be done. Manual Testing is also essential.
Myth: Testing is easy
Fact: Testing can be extremely challenging .Testing an application for possible use cases with minimum test cases requires high analytical skills. 

Comparison of Manual and Automated Testing

 Automation Testing is use of tools to execute test cases whereas manual testing requires human intervention for test execution.
Automation Testing saves time, cost and manpower. Once recorded, it's easier to run an automated test suite when compared to manual testing which will require skilled labor.
Any type of application can be tested manually but automated testing is recommended only for stable systems and is mostly used for regression testing. Also, certain testing types like ad-hoc and monkey testing are more suited for manual execution.
Manual testing can be become repetitive and boring. On the contrary, the boring part of executing same test cases time and again, is handled by automation software in automation testing.

Conclusion
Manual testing is an activity where the tester needs to be very patient, creative &  open minded.They need to think and act with an End User perspective.